
I love Mondays, it’s the one day a week that I let myself fully indulge in cruising around the internet and checking out all my favorite blogs. It really gets me excited about the rest of the week’s blog posting!
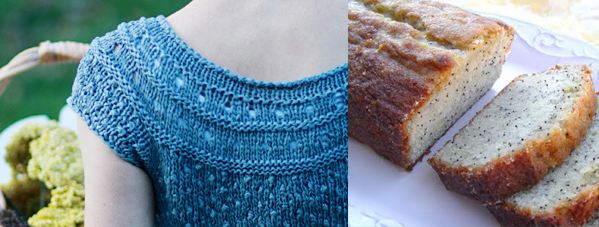
 Read more →
I made Molly a cat hoodie quite some time ago. Jason and I thought RapCat (checkers’ commercials) was just too ridiculous and therefore, pretty funny. We invented a scenario where RapCat was Molly’s secret lover and it was a long standing, pretty bizarre, joke. We even joked about Molly wearing RapCat’s hoodie, you know, the blue and blue one. We laughed so hard about it…. and then I made one for her and we laughed some more. And the really funny thing is she doesn’t mind wearing it at all!
Now I know that a lot of cats would have serious objections with any kind of hoodie being put on them, even if knit with the most love. So some other ideas for the hoodie – Big Panda Plushies, A willing stout puppy dog (a little pug maybe?), you get the idea.
Body:
CO 68 sts with CC; join in the round and place marker at beginning of round, being careful not to twist stitches.
Work 2X2 rib (k2, P2) for 5 rows.
Change to MC, St st until piece measures 6 inches from cast on edge.
BO 12 sts – right armhole, k10 – front stitches, BO 12 sts – left armhole, k to marker – back stitches.
Back stitches only:
Row 1: Turn work, purl to BO sts – left armhole (34 sts). Row 2: Turn work, k1, k2tog, knit to last 3 sts, ssk, k1.
Repeat rows 1 & 2 three times total. Break yarn.
Front stitches only:
Rejoin yarn at the front section so you start with a knit row.
St st 8 rows. (there are more rows on the front than the back to accommodate the upturn of the neck on a feline.
Neck:
Knit to end of front stitches; turn, cast on 8 using cable cast on, turn; k back stitches; turn, CO8 using cable cast on, turn; join in the round, k5. Turn, pm, purl 1 round to marker.
Row 1: Turn, k1, ssk, k to 3 sts before marker, k2tog, k1.
Row 2: Turn, purl to marker.
Repeat Rows 1 & 2 six times total — 12 sts decreased (42 sts remaining).
Hood:
Change to CC, repeat rows 1&2 three times — six stitches decreased; 36 sts total.
K12, pm, k12, pm, k12, turn. — Place Markers used are the same as placed in the neck section.
Row 1: Purl to one stitch before marker, m1, p1, sl marker; purl to marker, sl marker, p1, m1, purl to end, turn.
Row 2: Knit all, turn.
Repeat rows 1&2 six times total (48 sts).
Purl all one row.
Knit to second marker, remove marker, ssk, k1, turn.
Sl1, purl to marker, remove marker, p2tog, p1, turn.
Row 1: Sl1 purlwise, knit to stitch before gap, ssk (one stitch from each side of the gap), k1, turn.
Row 2: Sl1 purlwise, purl to stitch before gap, p2tog, p1, turn.
Repeat rows 1&2 until all stitches have been worked. The last row you work will not have a k1 or a p1 after the ssk or the p2tog.
Hood Border:
(K2, p2) to end. Pick up and work stitches continuing 2×2 rib along neck line, down one side and up the other, end with a p2, pm and join in the round.
Repeat (k2, p2) to end of round for 2 rounds. BO in pattern. Cut yarn, weave in ends.
Legs:
Switch to dpns if necessary and pick up and knit 34 in CC color around one leg hole, pm, join in the round.
Knit 13 rounds.
Decrease 10 sts evenly by k2tog.
Knit 6 rounds.
Change to MC, (k2, p2) to end of round, repeat for 4 more rounds, BO all stitches in pattern.
Repeat for second Leg. Weave in all ends and slip on your kitty.
I think Miss Molly will enjoy it this win- ter for running outside (we walk with her outside in the morning, it’s too cold in the winter and she gets all stir crazy). Maybe some kitty booties will be in the near future too!

I finally finished Jak’s sweater. Thank goodness we had some excellent, unseasonally warm weather this past month. I just had too much on my plate to be able to get it done in a timely fashion. But I did get it done!
The pattern that I used, the Darling Durby Sweater, was really great. I love the fact that it was made using his own measurements, especially because we have yet to find a pre-made jacket that will fit his extra long body: 29″ from the base of his neck to the base of his tail. The only complaint I have about the pattern is that the wording is a little confusing when decreasing for the underarms. But, if it wasn’t 2am, would I have been confused? The pattern is free, and I’m sure my patterns can be just as confusing, so I’m pretty happy with the whole thing.
I did alter the pattern a bit, I just can’t help myself. I decided to go ahead and forgo the body decreases and instead work the back like turning the heel of a sock. That way it snugs around his butt vs leaving some of his back and backside exposed. It took more yarn to do it that way along with a little more time, but I really like the way it looks.
The total yarn count was somewhere in the area of 6 skeins! Yeah, take that stash! There’s something so rewarding about making a really nice useful item out of junk laying around the studio. In fact, I saved us about $50 by knitting this sweater instead of buying one. I know time is money and all that jazz, but cash is cash and the less cash out the more we can save for a car.
And doesn’t he look smart in his blue and yellow jumper?
Have you made your favorite animal buddy a coat lately? What pattern did you use? Any tips for the rest of us just starting to get into it?
Happy crafting!
Kristin
p.s. I promise this is my last dog related post for at least a week. :)
This Saturday Jason and I delightfully welcomed the newest citizen of our home: Jak Jak Par, a retired racing greyhound. And, being me, I immediately looked up everything I could about knitting for dogs. You see, Jak has 7% bodyfat, and at 80 lbs and about 3 feet high he is a boney beast of a dog. His short fur has left him just as vulnerable to cold weather as much as you or I. In fact, the rule of thumb is that if you feel compelled to put a coat on when you go outside, you should put one on your greyhound too.
I would have just bought him a coat, but he’s huge and I’m having a very hard time finding one that will fit him. We are going to order a winter jacket from here, but that won’t get here for a bit and I want to start taking him for walks.
{his favorite thing – sleeping!}
As soon as we got him, I measured him up so I could cast on. 29″ from the nape of his neck to the end of his back (right where his tail starts). Lucky for me I found this great pattern for knitting on ravelry for free: The Darling Durby Sweater. It was the only pattern that I wouldn’t have to resize for him. You can use the measurements of your dog. So while the pattern writer used her own greyhound for the pattern, it can be applied to any dog’s measurements.
Now that I had the pattern decided, it was time for the yarn. I wanted bulky because he’s a big guy and I want this project to go quickly. I wanted wool so it would be both warm and water resistant. I wanted two colors because I personally love stripes, especially on dogs. Super cute. Mauch Chunky seemed like the most reasonable choice because I have loads of it around. But oh no! It’s all down at the office.
Not quite all of it, what’s this on the closet floor? Ah ha! Perfect! There was that crochet felted tote I made 2 years ago…and never got around to felting! As funny as it is, I’m actually knitting straight from the crochet bag. I’m striping the sweaters as the colors of the tote change from one to the other.
After our run to Des Moines yesterday to get dog supplies, about 1 1/2 hours in the car time, I’m just about finished with the neck. The knitting is pretty easy, which is great because I can read through the final version of my manuscript and knit at the same time, stopping to jot notes as needed. Excellent.
Here are two other patterns I want to try and make for Jak.
Greyhound, Whippet, and small dog sweater pattern on ebay
I also want to make a sewn jacket for him, but I’m not sure how it should be shaped, so we are going to get this one, then I’ll make his spring and rain jacket and maybe even a more heavy duty cold weather jacket for him–fleece lined with a rain proof outer fabric.
If you want to hear how Jak came to be in our home, you can read all the mushy love at first sight + adoption process here.
What’s your favorite dog pattern? I want to start collecting up the good ones to make later. Dog beds? Toys? Blankets? Toy totes? Coats? Booties?
I’m off to more knitting and manuscript reading!
Happy crafting!
Kristin
Hello there! It’s me, Karen. You might remember meeting me. Kristin introduced me here. I’m stepping out of the background today to share a few projects.
When Kristin started her Wardrobe Redress series, it got me thinking about my efforts to “fancy up” my wardrobe. Since my three little boys find shopping “SOOO boring,” I have to find other ways to update my wardrobe. Refashioning takes my old clothes and gives them a new life AND eliminates (some) trips to the mall. So far my projects fall into two categories: embellishment and reconstruction.
This is a simple concept. I took an aging t-shirt and added a design to it. Out of the many ways to embellish, I chose embroidery.

(Apologies for the wrinkled clothes. Ironing falls by the wayside at my house–three small boys.)
This shirt is comfortable and fits well. It’s an old favorite. Unfortunately, it became slightly discolored with small oil stains. By adding an embellishment, the stains are invisible because the eye is drawn to the design instead. I took this design and embroidered it on my t-shirt with supplies from my stash. I liked the idea of a design set off center and this one did the trick nicely. I tried on the shirt with the tracing paper pinned on it. I wanted to be sure that the embroidery didn’t end up in an awkward spot.
It’s been fun taking on the challenge of reconstructing clothes from one form to another. The things I’ve seen all over craft blogs are amazing and inspiring!
Recently, I took an overly-felted pullover sweater and combined it with a moth-eaten scarf. Both were in a sad state. I had intended to felt the sweater to fit me better and it shrunk way too much. The sleeves were at an embarrassing “I’m not a long sleeve nor am I a 3/4 sleeve” length. The body of the sweater was very short as well. The cashmere scarf was an orphan we had around the house. Providentially, the color matched the sweater perfectly.

Before my goof, I was going to make a button down cardigan. Since the scarf was such a great color match, I was able to salvage my mistake. I added cuffs to the sleeves and additional material around the bottom hem. With some buttons from the stash and a little rose from the scarf scraps, I made one of my favorite cardigans.

Another reconstruction project I had fun with is a ruffle neck top made from a linen skirt. (Again, apologies for the awful “before” picture. Hopefully it makes the “after” shot that much better.)

I bought this skirt for those “I just gave birth and have nothing to wear” days. Last summer, it was in the donation pile as it became too large. Around that time, a couple of my friends were swapping clothes. They told me this funny story of how one thought a certain item was a skirt and the other thought it was a poncho. It got me thinking, “maybe this skirt can be a shirt.”
After wearing the skirt around my neck and doing a lot of fiddling, I had a plan. First, I removed the drawstring waistband. Then I cut into the skirt. The rough sketch below shows my cut lines in red.

I was feeling a little intimidated, so I tackled the neckline first. After I cut the excess fabric for the new neckline, I re-attached the waistband. I didn’t have to make any changes to the waistband. All I needed to do was pull the drawstrings tight enough so that it laid flat around my neck.
I put on it on again to place the cuts for the arm holes. I used a tank top from my closet to get the right shape for the arm holes and side seams. Since the skirt was cut on the bias, the scraps from the side were perfect for finishing the arm holes. Since I kept the bottom hem intact, all that was left was sewing up the side seams.
I was wearing the skirt around my neck a lot to get everything just right. I felt ridiculous but it helped me get a good fit. And in the end, I had a ruffle neck top!

These projects were so much fun. It satisfied my itch to create and my old clothes became new again!
Karen Liao is a lifetime crafter and online editor for the Craft Leftovers blog. She sells her handmade goods for charity in her etsy shop, Turtlestar.
It’s been awhile since I started a new knitting project, so I wanted it to be really great. Something I would want to wear all the time. And something that would be brainless to knit so I can take it everywhere for me. At first I was going to do another in the round sweater (Candid Cardigan is a top down raglan in the round), but I wanted to carry it around with me. Pieces would be better. Okay, that’s settled, but what yarn? I dug around in my stash and found 8 skeins of Prairie Silk by Brown Sheep (50g/88 yards). So not enough for a sweater. Then I dug around a little more and found another 7 skeins, but in a different color. Ah yes, I remember now. Before I moved to Ames the Prairie Silk went on Sale at the Yarn Exchange and I bought up enough to make a sweater, but never did. Awesome! Sweater worth of yarn for the perfect striped sweater. Now for the pattern.
I have bought quite a few magazines, books, and pattern collections in the last 4 years of my knitting life. I really wanted to have brainless project. That equals stockinette stitch, in pieces, and a pattern written by someone else. I pulled out everything (always fun!) and picked this great hoodie to knit. It’s Gabrilla by Debbie Bliss. I have more than enough yarn for the pattern, but the gauge was a little off. I went down a needle size and the gauge just wasn’t working out.
When I want to knit with a yarn that is not right for a pattern, there are a few steps I go through to try to fudge things before I do an out right rewrite (something I try to avoid at all costs because it is such a pain). In the case of my newest knit project, I want to use a heavy worsted (almost an aran) vs a light worsted (almost a dk).
First, I decided what I wanted the drape to be. I knit up a swatch with size 5 needles and liked the way it looked and felt. Not to stiff, not to loose. Then measured the gauge, wrote it down and set it aside.
I looked at the CO number for the size I needed and the gauge and divided the CO by the gauge to get how many inches that equaled. Then I took the small size CO and divided that by the gauge I was getting. It turned out to be the same inch count! Perfect. And that happens a lot of time. It’s a great trick to be able to use different size yarn than what a pattern calls for.
1. Make a gauge swatch with the yarn you want to use with the needles you want to use.
2. Measure yourself and select the right size for you as if you were knitting with the right yarn. So Bust 36″, look at that size for the cast on number. Divide that cast on by the gauge the pattern is written for. That will give you a number in inches. 120 sts /6sts per inch = 20 inches.
3. Then if you want to go up in yarn weight, divide the cast on number from the size smaller by your gauge number: ___ sts/_sts per inch = _____ inches. If you want to go down in yarn weight, select a size larger.
4. If the numbers work out, cast on and follow directions for the smaller or larger size.
A few things to keep in mind when working a pattern this way:
Make sure to follow the numbers for the smaller or larger size for directions that are horizontal (cast on, arm holes, neck, etc), but work directions for things that are vertical in the size you are. So follow directions like “continue in pattern for 3(4, 5, 6, 6, 7)inches” in the size you are. Otherwise you might end up with a really short sweater if you are tall. The other thing to remember with patterns that are made with less ease have shaping for your bust (usually, or they should anyway). If you go down to the smaller size for the cast on number, you may need to follow the directions for your size if it calls for bust shaping and the smaller sizes do not. And same goes for smaller sizes going up to the xl size for their cast on number. I’m pretty flat and do not need anything extra on the front side, so bust shaping is pretty pointless and will make for an awkward fitting sweater.
Happy Knitting!
Kristin
Quite some time ago I posted about how I was working through my stash of works in progress. I thought (unrealistically) I would be able to post progress on this pile of wips each week. Ha! Yeah right. Let’s see that was how many weeks ago? 12 weeks. Yep, twelve. Well, I have been trying. I haven’t started anything new, so that’s something right there (outside of work related projects of course). And I have stuck to my finish 2 and start 1 rule.
Just this past Sunday (week ago yesterday) finished my Candid Cardigan (pattern coming in 3 years or so, haha, not really, but I didn’t take notes, so I have to make another one before I write it).
Then, I finished my Wavy Lacelette Socks on Tuesday. I’ve been teaching beginning knitting, so while my students are working, I’ve been plugging away at a mindless project (socks).
I have been wearing the sweater non stop because I love it so much. I wore the socks for 2 days straight because they were so warm and cozy. I washed them and wore them for another two days. I love them both! It is so fun to finish and then use something you make.
I jumped right into my next knitting pattern, but I’ll tell you all about that on Wednesday.
Happy Crafting!
Kristin
Alyssa Devanny of Refashion released a wonderful book right up the Craft Leftovers ally. Everything in the book is repurposed, reworked, and well! You guessed it refashioned from clothing and scraps of fabric.
“Make your own ‘trashion’ statement by recycling your tired, worn-out clothes into unique, eco-chic pieces you can wear the same day.
The 10 projects inside this book have detailed, step-by-step illustrations and have been designed with beginners in mind. The materials are readily available from your own wardrobe or charity store.
‘Refashion’ is an invitation to stop buying and start shopping in your own wardrobe”

The instructions are very clear and the projects give you a lot to work with. Not only are there directions for the specific projects, but you learn skills that will give you the confidence to cut, snip, sew, and crochet your other wardrobe items in unique ways.

I love the cardigan project and the little girl jumper is so cute! I really love all the projects too, but I don’t want to give too much away. You can pick up your very own copy here in the Refashion shop.

And don’t forget to check out the Refashion etsy shop where you can get finished items to jazz up your style – in a great eco friendly way too!
I just love her cute dresses for little girls, they are just about too cute to stand and shipping is only $4 all the way from Australia! Completely doable.

And I have a surprise for you, Alyssa has shared a great tutorial with me that will be released this Friday! A super cute dress made out of a pillowcase!
I was delighted when Debora of Storey Publishing asked me if I would like a copy of the The Sweater Chop Shop: Sewing One-of-a-kind Creations from Recycled Sweaters by Christina Ffrench. Would I ever! This book is lovely in every way. I really enjoy how instead of models, this book is completely illustrated. *cover and main project illustrations done by Marguerite Sauvage, all the tutorial illustrations were done by the author, from what I can gather from the inside flap anyway. Both are great illustrators.* The author has many insights on how to use a sweater – both fulled and straight up. And she has this great diagram on the most efficient way to cut up the sweater for parts. Explaining stitching methods for piecing together the sweater – a key thing. This is more important than might be first expected. To keep the fabric even and from pulling, or the threads from pulling out. The instructions are superb.
Read more →
Winter is always the season of weaving for me. With my overly large floor room, it’s the only time of year that I’m okay being tucked into my basement studio for hours shuttling back and forth. I turn on the space heater, bring down a pot of tea and put it on my candle warmer. [...]

What people are saying