Past Perfect: Fixing Broken Ornaments
Now that Thanksgiving is over, I am happily jumping straight into Christmas mode, and part of that is getting a tree up and decorated. A little Christmas cheer to start the season out right. So what happens if you open up your box of homemade ornaments, or hand-me-down extra special ornaments, and find them broken? Well, when I knocked my tree over last year it inspired a post about how to fix ceramic ornaments. Carolyn, who first told me I should post about fixing them, reminded me last night that “hey why don’t you re-post that one?” Good idea! Thanks Carolyn. So pulling from the past, here is the perfect post for fixing up those smashed up treasures:
Last night I had a bit of a tragedy. After I took my pictures of the popcorn garland the whole tree fell over! It was my fault. I had put all the ornaments on one side because I haven’t had a chance to make enough to cover the whole tree and, well, you know, I wanted it to look nice. CRASH! On to the floor it went. I picked it up, checked the damage. Two hand painted ceramic ornaments that I made with my friend Carolyn were broken. Not bad, but enough that they would have to be thrown away…. yeah right… or fixed… there we go!
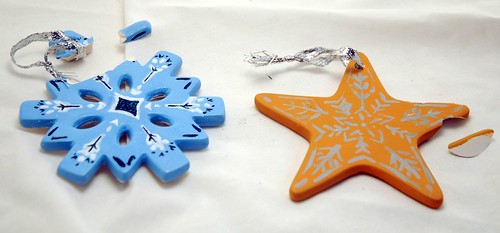
At first I was upset and then I was like “hey, this would be a great post for tomorrow!” I’m sure we have all opened a box of precious handmade ornaments and found them broken in half from having something too heavy placed on them… or an accidental drop… or a Craft cat climbing in the tree. Oddly enough that’s what Jason and I were really worried about. Turns out I am the one the dumps the tree and Molly has just given it a look or two and a flick of the tail.
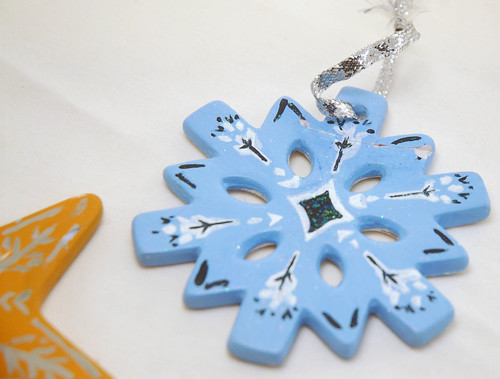
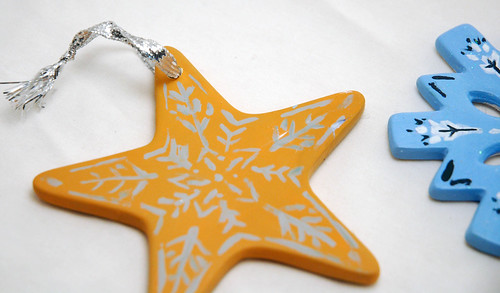
I’ve broken and glued quite a bit over my life (short as it may be thus far) and have figured out a lot of tricks (some learned from other and some figured out on my own). These ornaments, I just used some craft glue, held in place, kept really still and they seem to be holding just fine. I filled in the little missing parts I couldn’t find with the glue (after the initial glue together dried). Once that is completely dry (it will be clear), I’ll touch up the paint no problem.
So there are a few steps when repairing any broken ornament.
1 :: Find all the pieces
2 :: Pick the proper glue and tools
3 :: Layout your ornament pieces and fit them together like you would a puzzle.
4 :: Separate the pieces, but just so there is space between them. Trust me, if there is more than 3 pieces, it’s hard to remember when you are gluing it exactly what goes where when you have them in a pile.
5 :: Starting with the pieces closest to main body of the ornament apply glue with a brush, smooth it out and remove the excess, let it soak in for 30 seconds if using craft or wood glue on ceramic or wood ornaments. Fit in place by scooting together on a flat surface, hold in place. Depending, on drying time it might be a good idea to tape down the ornament and the piece to the flat surface you are working on. Repeat with all the pieces until it’s complete. Let dry for at least a half hour. Then fill in any cracks with glue.
6 :: Touch up with paint if you have paint in the same color.
Now here are some other tips::
When fixing a wood ornament, use wood glue. And to fill in cracks, use wood glue mixed with a little saw dust, my dad taught me that one. Then if you need to sand it smooth, use a fine grit sandpaper.
If you are fixing a glass ornament, use clear nail polish to fix cracks and nicks. Superglue works great to put the pieces back together if you have it, but if you go over the cracks with a thin layer of clear nail polish it helps to fill it in and smooth it out and makes them less noticeable.
If working with a sphere shape, you can place it in a cup to keep it steady while you work on it.
I hope this helps while you are unpacking your Christmas treasures!
Enjoy this post? Sign up for the Craft Leftovers mailing list to get a monthly update of new content and re-releases. You can also follow me on Instagram to check out the crafty projects I’m crafting. And of course, if you make something with one of my patterns, just tag it (#craftleftovers). I love seeing what you’ve made with your unique leftovers!
Happy Crafting!
Kristin