
How To :: Fabric Covered Button :: Part II
 In the last How To post I said something about sewing on a button without a shank and how I would show you how at some point. Well, I decided that really, this would be just an extension of the last how to post and if you make some fabric buttons the diy way I showed you last time, you really need to know how to do this so you can use them well. So here we go!
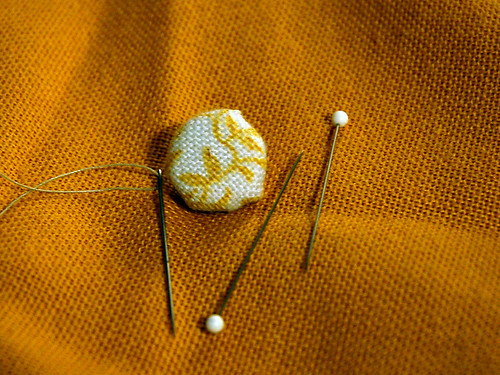
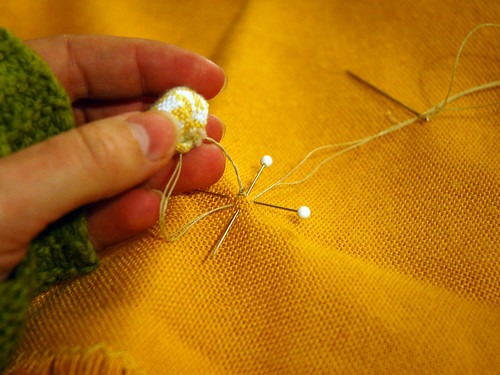
All you need is two straight pins, a sewing needle, and some thread.
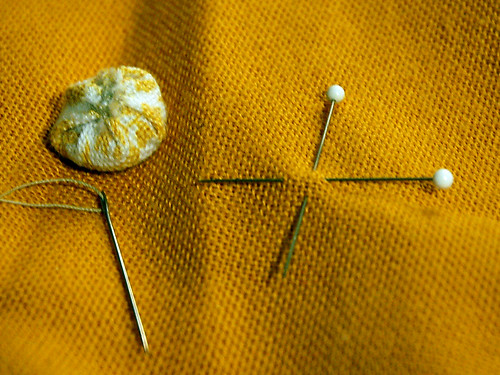
Cross the straight pins where you need to sew your button.
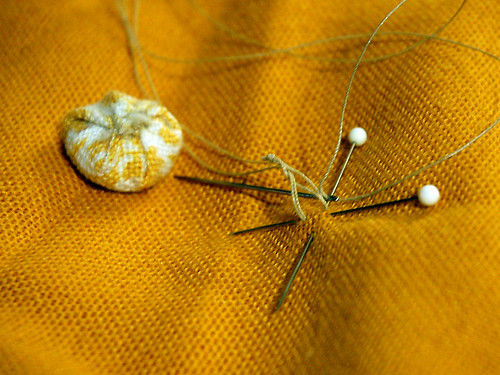
Knot and secure your thread in the center of your pin cross.
Needle through the button.
Needle through the fabric, going around the two pins.
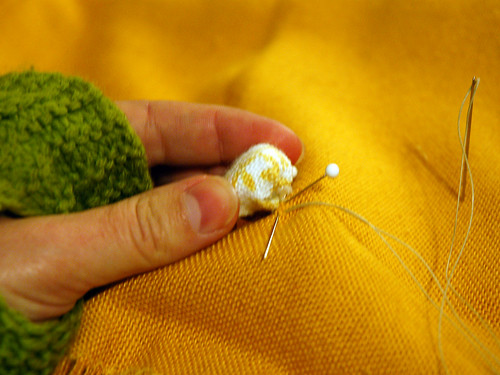
Tighten it up and go through the button, go through the fabric, repeat and repeat.

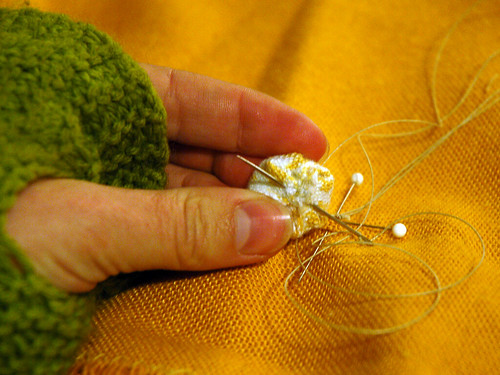
Now here is the trick my friend showed me (well, she showed me the pins too), wrap the thread around the thread going from the button to the fabric. Like 3 or 4 times is good. Then go into the fabric and knot it off.
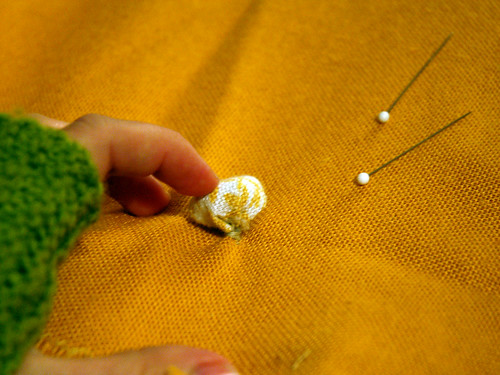
Button without a shank, now has a shank! Hooray!
++++++++++++++
Well, I’m heading to Lowes first thing in the morning to check out pvc pipe and pipe fittings for the hamper. I have some canvas, but I’ll have to pick up some more of that at Hobby Lobby I think too. That’s part of why this is not going to be a “Craft Leftovers” pattern, it’s not made from leftovers at all. Haha. But I think you will still like it. I’m going to check out some wood too because I’m going to make my own warping board. That I’ll be posting over on my other blog. There has been a lot of weaving going on lately and I ran out of warp! I need a way to measure some out. DIY warping board time!
Have a good night!
Kristin

these patterns are great!!
is there any way to download them?
err .. not patterns … i mean directions :P