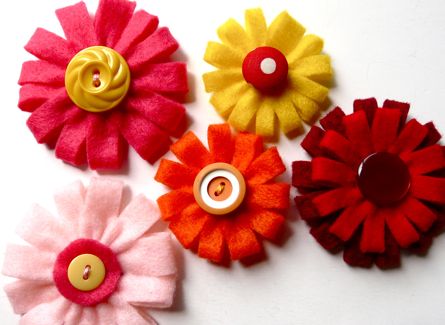
If there ever was a classic instant-gratification craft, it’s the venerable felt flower. I was playing around one day, and stumbled upon this method for making an interesting zinnia-style design. Hope you like!
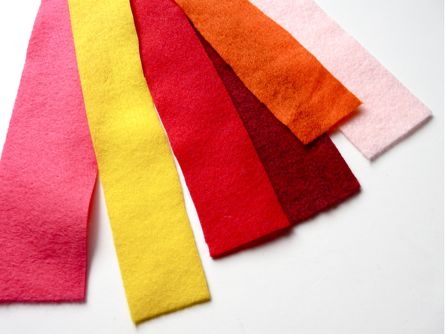
First, you need some strips of felt. I’m using a variety of widths here: 2 1/4″, 1 3/4″ and 1 1/2″. They should be at least 6″ long.
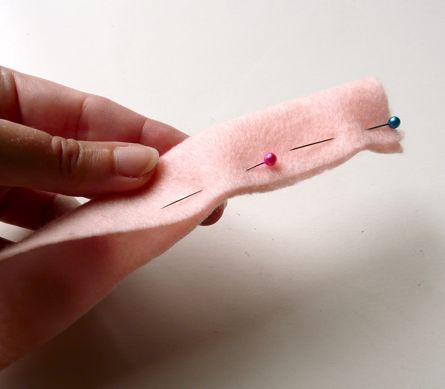
Fold a strip in half lengthwise. Pin the edges together if you like.
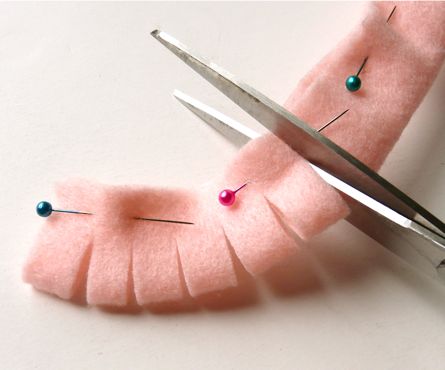
Then, cut a series of slits into the folded edge. Mine are about 1/3″ apart. You can cut them narrow or wide as you prefer. Just try to keep them reasonably equal.
Snip your way along about 6″ of the strip, and leave any excess attached for now. This gives us some flexibility in our flower design.
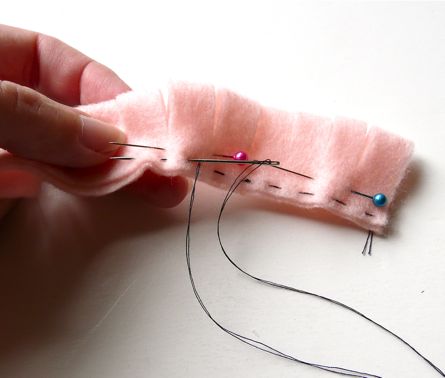
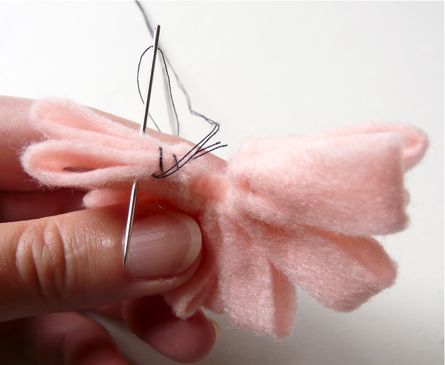
Now, thread up a sewing needle with about 18″ of doubled thread, and tie a secure knot in the end. Sew a small running stitch along the edges of the folded felt, sewing the two layers together.
(I should add: I’m using contrasting thread here for visibility. You’ll want to use coordinating thread.)
As you sew, pull on the thread to gather the strip. You can gather it as much or as little as you like, until you arrive at a flower shape you like. When you have a pretty shape, go ahead and cut off any excess felt strip.
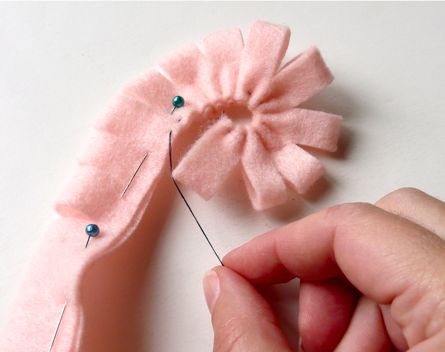
Take a couple little tack stitches through the end of the gathers to lock them in place. Leave the needle and thread attached to the flower.
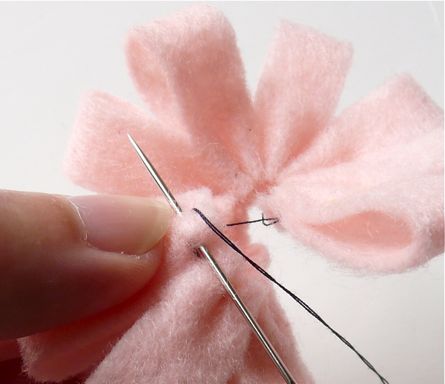
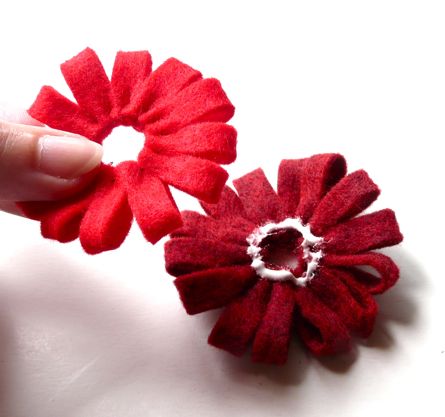
Now, fold the flower in half, matching the two ends as shown. Take a couple little whip-stitches through all the raw edges to join the flower into a circle. Knot the thread securely and cut.
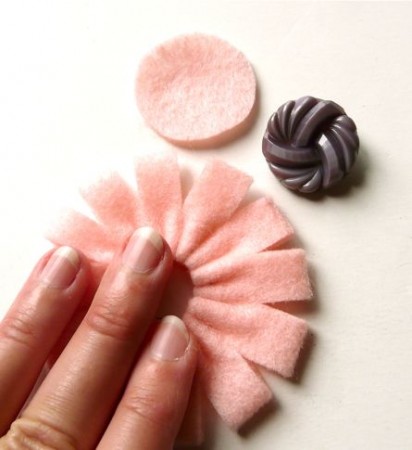
Gently flatten the flower and adjust the gathers. Cut a felt circle large enough to cover the gathered area. And, find a fabulous button.
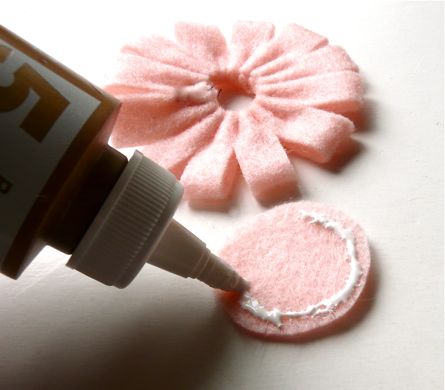
Glue that felt circle to the back of the flower with tacky glue. Let the glue set for about 10 minutes.
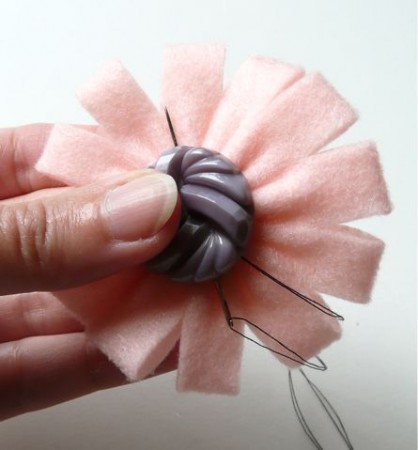
..And then, sew the button to the front of the flower, sewing through that felt circle you just glued on. You can use a shank button or a sew-through button for your flower center, incidentally.
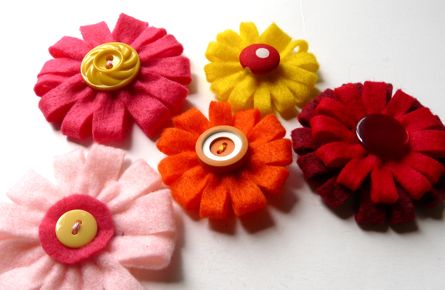
If you don’t have any buttons large enough to cover the gathers, you can always cut another circle from contrasting felt and then sew the button over that – take a look at the light pink flower in the top photo for an example.
If you want to, you can make a second, smaller flower and glue it to the first one before you add the felt circle and button.
From here, you can glue a pin back to your flower to make a brooch. You can sew a cluster of them to a tote bag. You can glue one to a greeting card or scrapbook layout. You can use them as embellishments on scarves, hats, softies, pillows – oh, you get the picture!
+++++++++++++++++++++++++++++++++++
Thank you so much Diane for sharing this great fun tutorial with us! I think I just won’t be able to help myself and have to make one. She’s made it look so easy and as she said at the beginning of the tutorial, it’s such an instant gratification project! I love those! And so cute. I think it’s just the thing to go on my new crocheted sun hat… and maybe on my jacket too. What about on my new tote bag I’m making from Weaving Unloomed… I think there too!
Sister Diane – aka Diane Gilleland – says that she’s “made things my whole life, and would gladly give up most household chores for an afternoon of serious crafting. When I’m not crafting, I produce podcasts, and make zines, and write and blog about crafts. I live in Portland, Oregon – the coolest city ever. I also run DIY Alert, a website for Portland crafters. If you’re a local, you should check it out.”
Have fun making some button fun projects this weekend!
Kristin

What a cute idea. So easy..
This is fabulous! Sister Diane is my craft hero, I’m in awe of all the projects she manages to get done!
Saw the article in Sew Beautiful and descided to look you up. Just purchased the pattern for the magazine jewelry.
Very excited about this as I have seen purses done with this technique and wanted to know how. I am going to make pendants for my wearable arts group for Christmas! Looking forward to getting the pattern. I also have a Rene’s Creations page on Facebook. I make Women’s and Children’s clothing and accessories. I do a lot of traveling so I’m able to sell my art on a consistent basis. Always looking for more inspiration. I also ordered your book: Kanzashi In Bloom. Can’t wait to get it!
beautiful.. this is a terrific idea that i could use for my not yet born daughters nursery..:) i just hope they turn out as pretty as they are here..
Thanks ever so much!
I can see spending an evening of making those adorable flowers. Thanx for sharing. =)
Beautiful Flowers and wonderful pictures!
Congrats.
I’m from Brasil and a want to thank you for sharing this cute idea.
01/08/09 at 16:14
Really something cute to make… it will be fun to make these.Thanks for a so simple & cute idea
What a fantastic flower. I can’t wait to make one (or several)!
ces fleurs en feutrine sont magnifiques
merci de nous montrer comment les fabriquer !
bises
Amei o passo a passo,Jesus te abençoe,muito lindo,bj.
Great little flowers! Thanks!
x
I love this flowers,very cute…
Thanks for sharing the tutorial. So lovely.
These flowers are adorable! Can’t wait to make some!
Thank you for the fab idea I used it for mothers day
I will try this – looks like a great way to spruce up my wheelchair totes
U roc! these are so cute – thanks so sharing!
Beautiful, how to see enother feltro flowers with pass a pass..how to make
I’m peinter and make art flower, scrapbook,
You are a very talented person and a very handy craftsman. If you want more flowers for your future work, I suggets some roses. I just love rosews because they are so dangerous, subtle and majestic… Roses are special flowers. Hope you agree with me.
Digite seu comentário aqui.Olá! Belíssimas flores. Parabéns pelo trabalho.
Digite seu comentário aqui.Olá! Belíssimas flores. Parabéns pelo trabalho.
Wow, you got talent and what you did shows a lot of craftsmanship, but i wander how much time would take for you to make 5 flowers. They look really great but i`m still a fan of Roses and i think nothing is more simple but still so elegant like red roses.
I love this so much! Thank you for clear tutorial!
Dita
https://handmadenest.blogspot.com
linked. Thanks
Hi, This has to be the cutest thing I have seen! It looks easy too. I am a complete newbie to crafting and things like this and I just bought some plain cheap t-shirts for my 3 year old and I was looking up ways to make them prettier.
I looked up embroidering and that seemed like a lot of work, then applique which looks doable, but I don’t have fabric scraps + I might ehem.. mess it up, but this is just perfect!!! I have acrylic felt (I assume since it was bought from a bookstore) available, I can try out as many as I want, I have been eying some cute buttons waaayhay, pretty flowers here I come.
Thank you sooooooo much for this tut, I am bookmarking rapido!
Just made my first zinnia flower! I love it. This is the cutest flower~ I will make several crafts for my daughters. Thank you so much for the tutorial and sharing a fabulous idea.
very cute, lovely idea!
wonderful
I’ll have to try some of these!
very very good, that perfect flower congratulations
I loved, i ll try to make some one now.. very nice tutorial.. congratulations to your performace!!! =)
hello,
I´M MARY FROM SPAIN, IT´S AN EXCELLENT IDEA. I´LL TRY TO MAKE SOME OF THESE. KISSES
fabulous idea, perfect for my hippy night!
So cute!
I’d love it if you shared this with the Fun Family Crafts audience. FFC is similar to Craftgawker but it only features kid friendly tutorials. Looking forward to seeing what fun crafts you submit!
https://funfamilycrafts.com
thanks for this great tutorial! i found this on pinterest. i just made a ton of them in different sizes and stacked them for a friend’s mobile for her nursery. thanks so much!! it looks awesome!!