
Cardboard Box Looms: DIY Weaving at it’s finest!

Weaving is one of the best ways to use up buckets of yarn scraps. And, it turns out, cardboard boxes too! This is a super fun project to take up a few hours and end up with a mountable little tapestry at the end of the day. You can make it with your kids and have them take turns weaving. In my case, we are setting up a load of these at the Ames C.art art festival booth to have the passer-by’s take turns on them. We love exposing everyone to new ways to be creative, and to make it accessible as possible. What’s more accessible than a card board box and a pile of yarn? Don’t answer that, on to weaving!

{I ended up not needing the packaging tape, but it just seemed like a good thing to have around no matter what}
::Materials Needed::
- Sharpie Marker
- X-ACTO Knife
and Cutting Mat
- Pencil
- Packaging Tape
- Yarn for the Warp
(at least 5 yards, more if your box is bigger)
- Sturdy small box, like this Ziploc Bags
box
Enjoying this project? Sign up for the Craft Leftovers mailing list to get a monthly update of new content and re-releases. You can also follow me on Instagram to check out the crafty projects I’m crafting. And of course, if you make something with one of my patterns, just tag it (#craftleftovers). I love seeing what you’ve made with your unique leftovers!

I wanted to make two little looms from one box, so I cut this one exactly in half. It ended up being at the 4″ mark. Unfortunately, I only had the idea to measure, then mark, after I attempted to just freehand a line – it was off and squiggly. Good thing for rulers.

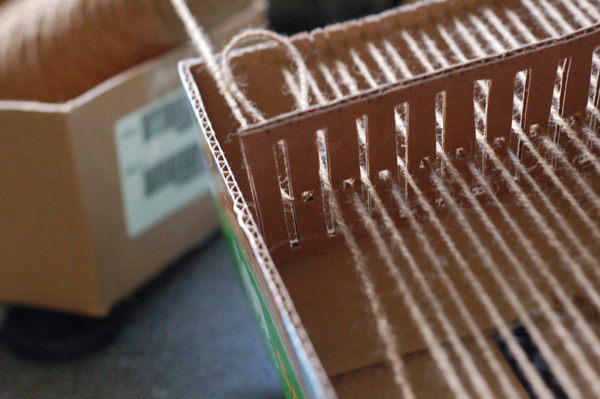
Now, it’s time to measure out the notches on each short edge of the box to hold the “warp”
Note: Warp is the yarn that runs vertically on your loom, weft is what you weave over and under the warps horizontally.
I measured out every 1/4″ and made a little 3/8″ notch, then I set the box aside for the time being.

I cut a rectangle from a scrap piece of cardboard so it was about 1/2″ smaller than my box is wide. The rectangle is about 3 1/4″ X 6 1/4″.
I measured out 1/8″ and 3/8″ along the top and bottom of the cardboard and then drew out the 1/8″ wide gaps to be cut out. Then I eyeballed little squares at the center point of each spacer.

Don’t worry about trying to cut through the cardboard in one go, make you initial cut, then cut again. Be patient. Use really sharp blades, I had to change mine out once with all the cardboard cutting I did.

Now you can warp your box loom a couple of different ways. I think the more standard way is to cut lengths of yarn about 6″ longer than the box, thread them through one at a time, put them into the notches, and tie bundles of say 4 on each side. But, my brain doesn’t always work, it works in a “how can I get the most out of a minimal amount of yarn” way. I just really didn’t like the idea of having to tie off all that yarn either. I know myself and I know I would manage to make it into a huge tangled mess. But that being said, if you have a bunch of shorter lengths of yarn vs 5 yards of just one, the first option would be the way to go.

First I simply threaded the yarn through the spaces and the holes. Then I teased out enough yarn to tie a slip not and secure it into the first notch.

Then I continued to tease more yarn off the larger spool and loop it around the notch at the other end. I kept teasing out the yarn and looping it around the notches.

Here’s a better picture showing how I would pull out the next loop of yarn so I can place it into the next notches.

And here it is when I’m on the last two loops of yarn and the last two sets of notches.

And placing it into a notch.

I cut the yarn so there was enough to tie off. Then I realized that instead of tying it off, it would actually hold the tension better if I woven it around the notches, so that’s what I did.

And now it’s time for the fun part: weaving!!!

Placing two pieces of cardboard into your warp as your first two “passes” helps to keep you from having to work right against the edge of the box. Plus it gives you a little ease so you can easily tie off the ends when you take it off the loom.

By twining the next two passes, you set your weaving up to have a nice evenly spaced set of warps.

Arching the weft and then beating it with a fork after you’ve closed the shed (the gap that’s created by pushing the card board harness down or lifting it up) helps it not pull at the sides (salvage) so much and have a more even tension.
Operate the harness (piece of cardboard with the yarn going through it) by pushing it down or pulling it up.
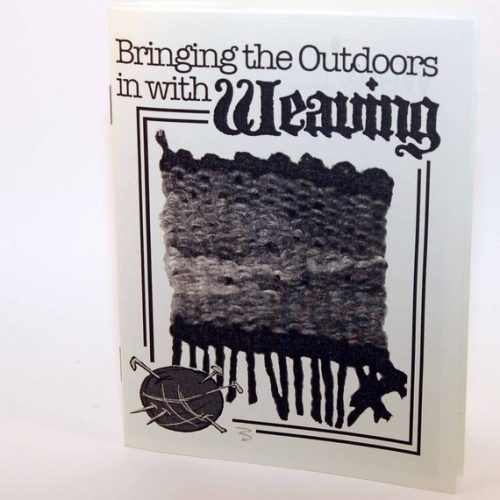
Get some more weaving inspiration with a fun little mini book I made called Bringing the Outdoors in with Weaving! You can get a copy in the Craft Leftovers Shop or on Etsy.
Sign up for the Craft Leftovers mailing list to get a monthly update of new content and re-releases. You can also follow me on Instagram to check out the crafty projects I’m crafting. And of course, if you make something with one of my patterns, just tag it (#craftleftovers). I love seeing what you’ve made with your unique leftovers!
Have fun & happy crafting!
Kristin Roach


Kristin, this is just fabulous! It’s a project anyone can do for very little cost and your tutorial was great! Is that regular worsted weight yarn you are using for the warp, or is it some kind of jute or small rope? I suppose you could use either, right? I’m going to bookmark this one and save it for a rainy, or snowy, day to do with my kids! Thanks so much!
MGM
This does look fun. I just might have to try this out on a rainy day and use up some of my yarn scraps.
It is the perfect kind of project for a rainy day :)
Thanks Kristin
This is excellent and I will certainly make one. I find that young kids really enjoy weaving
It is a great use of cardboard boxes,
I am frustrated by the lack of weaving looms that one can buy
martyn snell
this is awesome! I know, I should probably make one for the kids, but we all know that’s not gonna happen. I’ll make one for myself and HIDE IT!!! :) Had a loom as a kid, a little wooden one, but it didn’t work too well- too complicated for a nipper. I bet this one works ace and even I can’t mess it up! Thanks so much, I’ll be loving it (once I found a box, which might just be the most complicated part)
What a fabulous idea! I just added it to my list for Cardboard Boxes
Up-cycled!
https://www.brainstorminbloom.blogspot.com/2012/12/cardboard-box-up-cycled-csa.html
Thanks,
Sara
This could easily be adapted to plywood or pine by a competent woodworker :)
I would have liked to seen a finished project.